
10 Gallon Igloo Setup
-
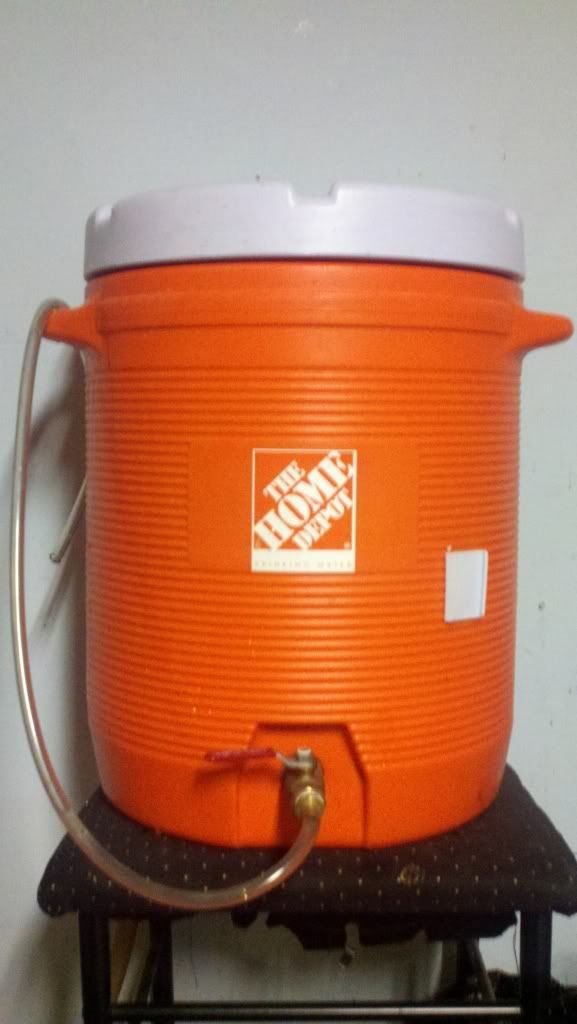
So, here is a fairly straight forward build. A certain orange box store sells these 10 gallon Igloo coolers. The price difference between the 5 gallon and the 10 gallon is pretty much negligible for the amount of range that the 10 gallon cooler will allow, so just buy the bigger cooler, it's worth it. This setup will allow you to make 10 gallons of regular beer or you can use it for making smaller batches of some super high gravity stuff (barley wine, imperials etc.). I hope you guys enjoy the build.
-
So here is the valve setup that is needed. You can go balls out with stainless valves and fittings here, but CA safe brass will be just fine. I don't think the big box stores carry anything but CA safe brass. Anyways, the valve is a brass 3/8" standard ball valve. There is also a brass hose barb fitting on the output of the MLT. This fitting is necessary to attach the hose to. I need to break down the bulkhead setup real quick and take some more pics, brb

-
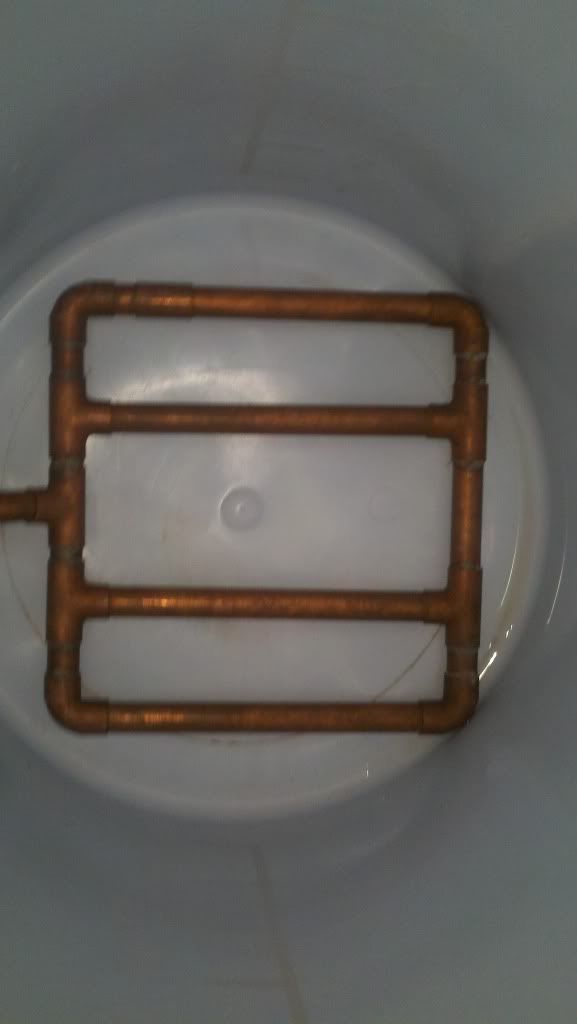
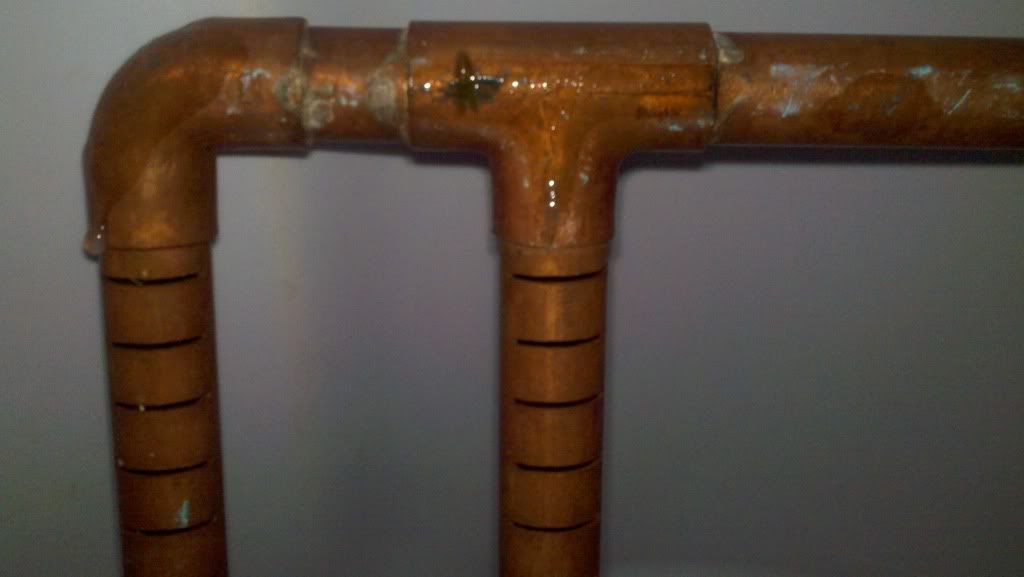
This is the topside of the false bottom. If you buy one stick of 1/2" copper, you will have enough to make 2 or three of these false bottoms. If you notice that the vertical joints are not soldered, this aids with cleaning of your setup. You can purchase the tee's and 90's at the big box store for about $10.Total price so far$???
-
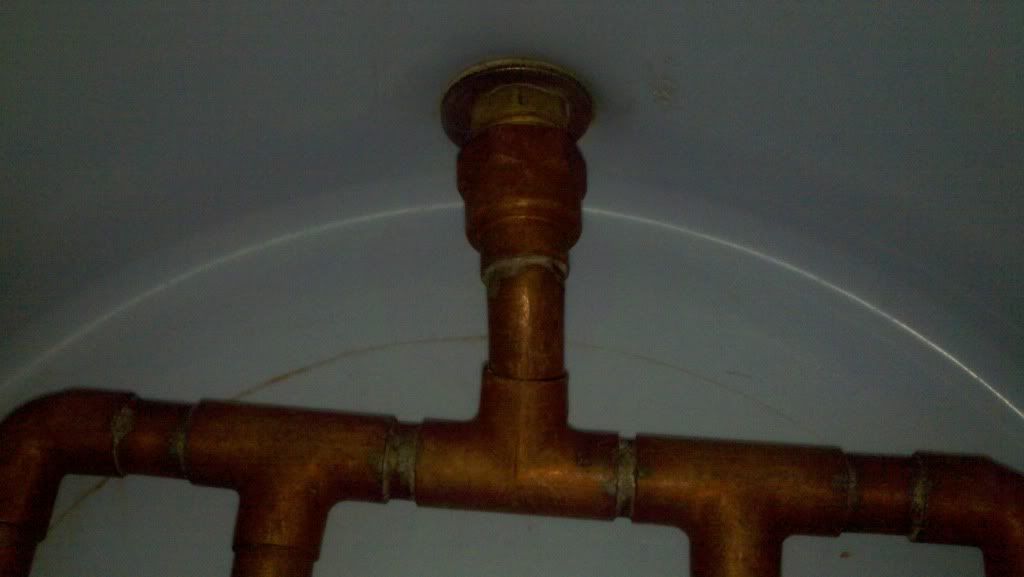
Here is the bulkhead setup from the inside. A threaded coupling with a sweat soldered 45 degree coupling will provide you with a tube that the false bottom will "snap" into when placed in the cooler.If you notice, the connection between the false bottom and the bulkheads 45 coupling is not soldered. This allows you to remove it for easy cleaning.
-
I gotta clean this up and add a better pic. Here we go with the false bottom. If you notice, all of the vertical 1/2" copper tube have lines cut into them. You can do this may ways. A hack saw will work fine here. This will allow for larger chunks of grain to build up and create what is known as a "Grain Bed". This will act as your filter. After a few rounds of Vorlauf'ing your beer will become clearer and clearer. A clearer boil is better. This will decrease the amounts of proteins in the wort which helps to control boil over.
 I got one more pic coming and I have to rotate the first.
 -
Awesome build thread. Simple but effective! Did you do anything to get a good seal on the snap-in connection? I have something similar in my mash tun, but had to use an oring to get a good enough seal to complete the mashout without breaking siphon.The only thing between me and a train wreck is blind luck..... - Kenny
-
My pour off is very slow, it allows for the wort to drain from the grain. The batch sparge takes the rest of the syrup into the boiler. I would suggest about 1/4 turn on a ball vulva like what is shown. As far as an O-ring on the connection, I don't use one. The slow rate at which I extract allows for the grain to drain out and fill the output manifold without air bubbles. Remember that patience is everything.


